Create Image from Snapshot
On this page we will discuss the workflow, that can help you to create an Image from Snapshot.
Table of contents
Prerequisites
In this article we will assume, that we have already created the following resources, that refer to the Project named Test-Project that was created in the Organization named Test-Organization:
- CLI User (Name: test-conn) - which RC file has already been loaded;
- Ubuntu Virtual Machine (IP: 185.226.43.42, Name: test-1) - that was created with an additional firewall, configured to allow connection to this VM remotely via SSH.
To find more detailed instructions see the next articles:
CLI Users;
Virtual Machines;
Access Linux VM.
Workflow
The workflow for creating an Image from a Snapshot consists of three steps:
- Prepare the Snapshot;
- Create a Volume from the Snapshot;
- Create an Image from the Volume.
Let’s take a closer look at each of them.
Prepare Snapshot
To create a Snapshot from the current state of the VM do the following:
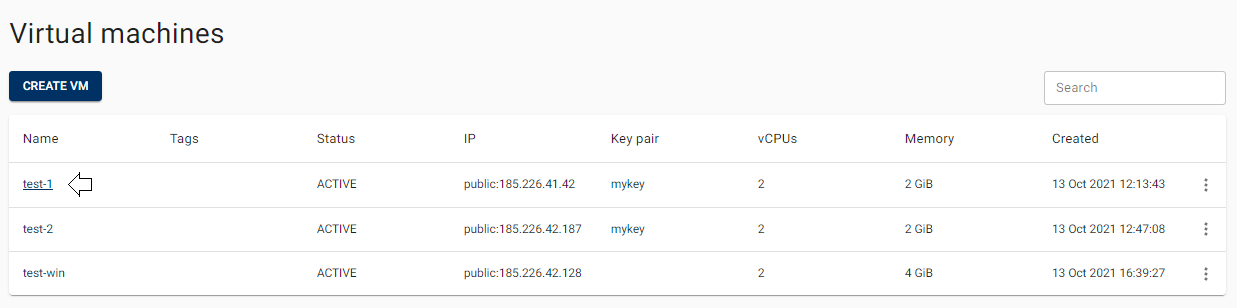
- open the Virtual Machine details page - for this click on the Name of the corresponding Virtual Machine:
It is recommended to stop the Virtual Machine before taking a Snapshot.
To find Volumes with an “available” status, go to the Volumes page. For this select the Storage from the VIRTUAL DATACENTER block in the side-bar menu and click the Volumes TAB.
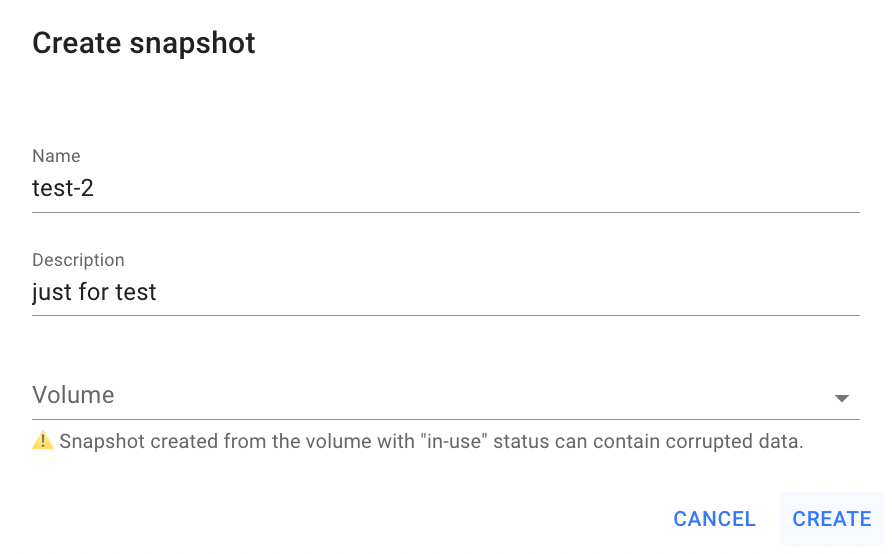
go to the SNAPSHOTS TAB and click the CREATE icon in the upper left corner:

fill in the form on the next opened Create Snapshot window and click on the CREATE icon:
After these steps, the newly created Snapshot will be added on the Snapshots page.
To find more detailed instructions about Snapshot creation, see the article: VM’s Snapshots.
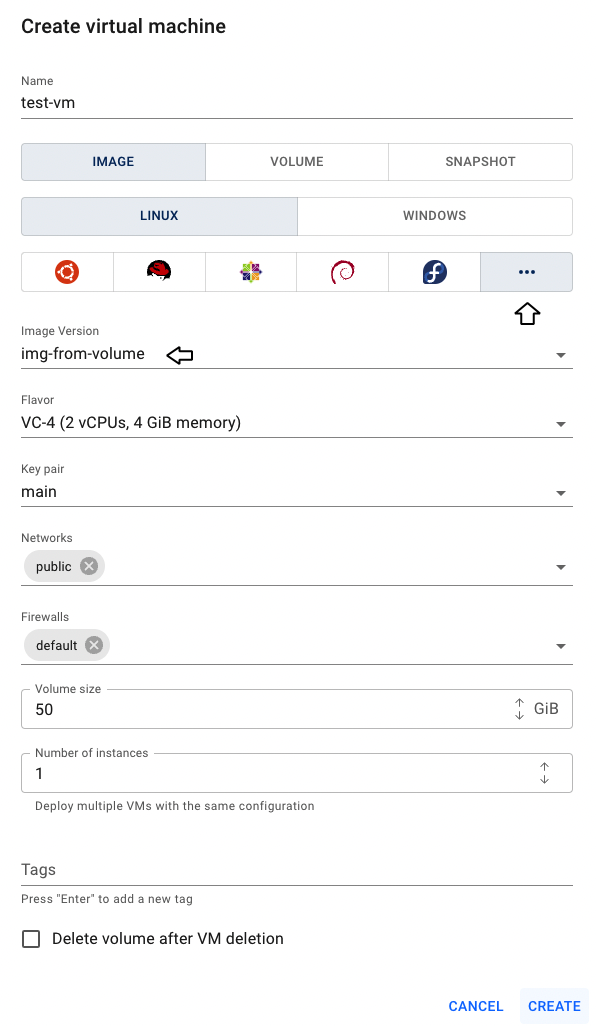
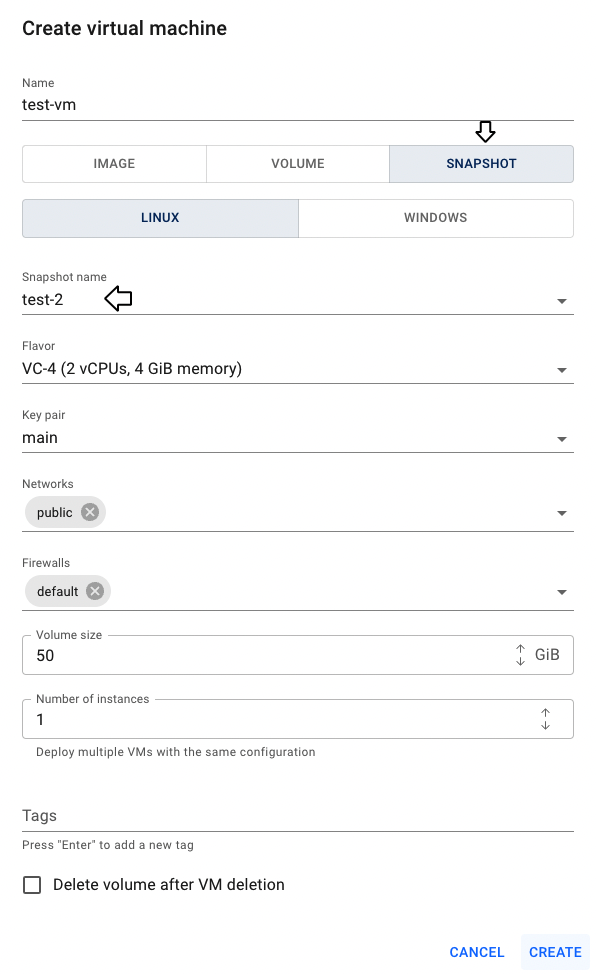
You can check if this Snapshot is working correctly by creating Virtual Machine from it:
Create Volume from Snapshot
To create a Volume from the Snapshot do the following:
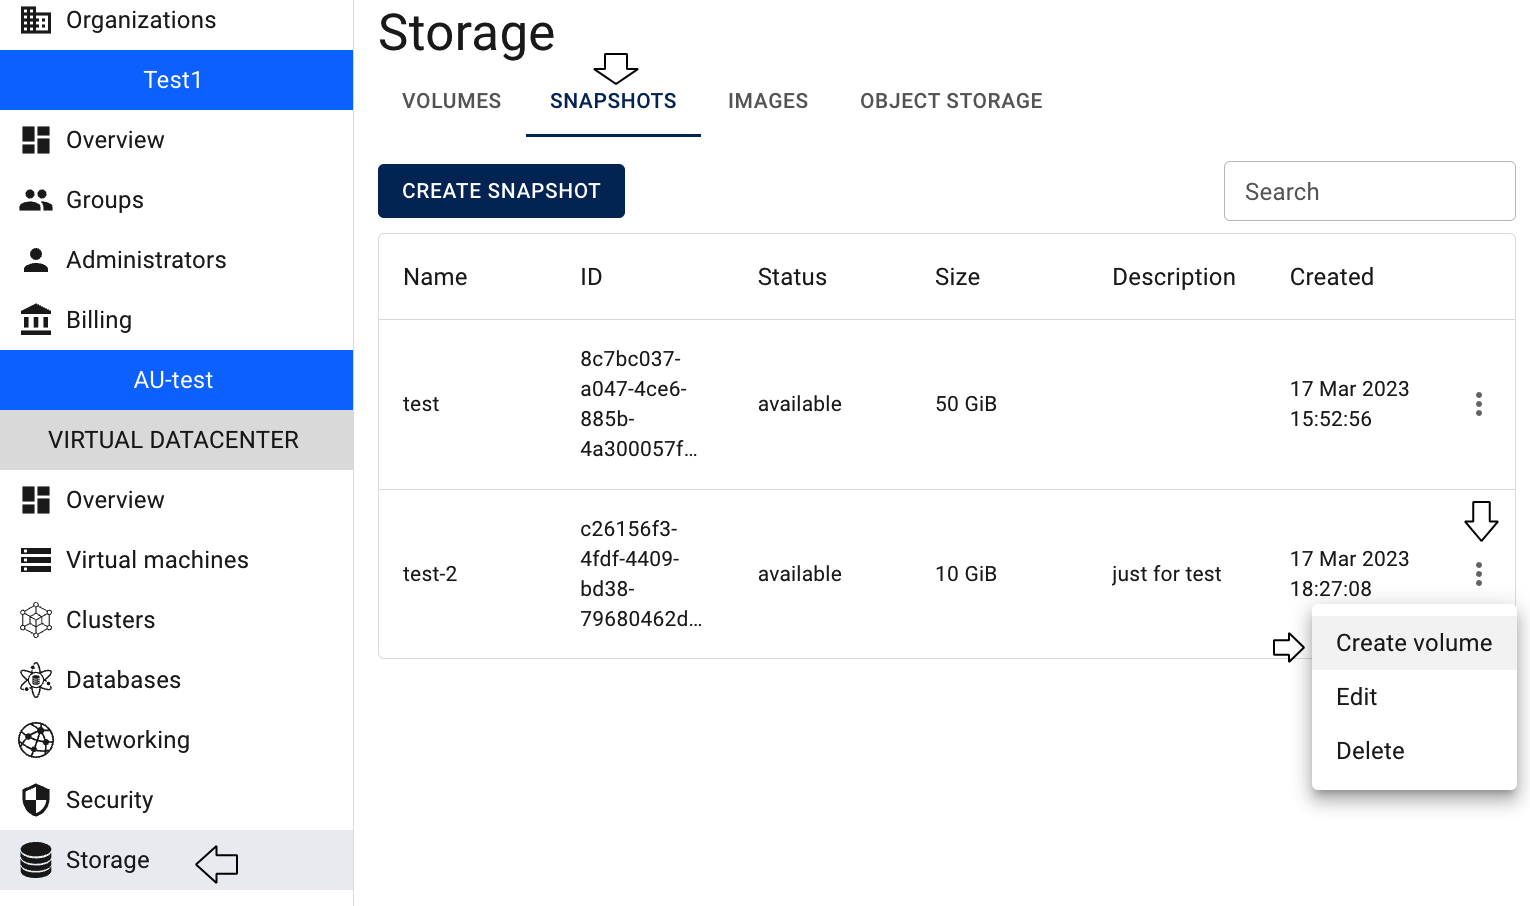
open the Snapshots page, click on the Actions icon of the selected Snapshot and select the Create volume in the list of available options:
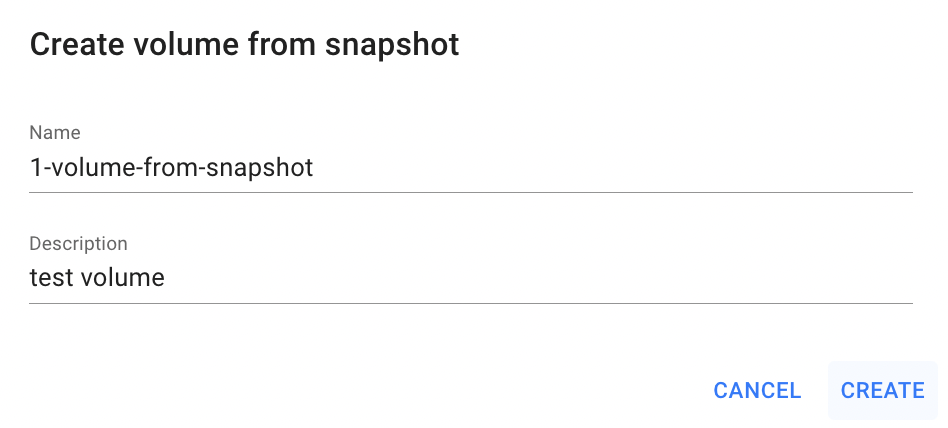
fill in the form on the next opened Create volume from snapshot window and click on the CREATE icon:
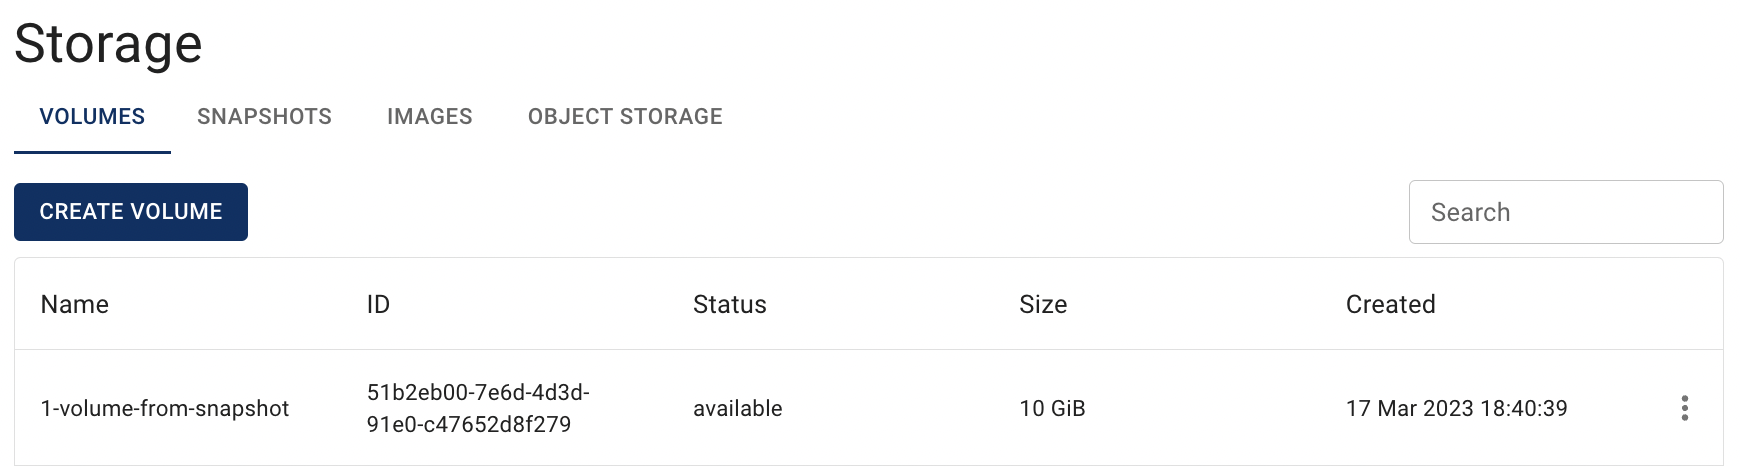
After these steps, the newly created Volume will be added to the Volumes page with the status available:
To find detailed instructions about Volume creation, see the article: VM’s Snapshots
Create Image from Volume
To create a Image from the Volume do the following:
connect to the perviously created Virtual Machine in the current Project Test-Project;
To find detailed instructions, how to connect to the Linux VM, see the article: Access Linux VMinstall Openstack client on the current VM;
To find detailed instructions, how to Install and configure OpenStack CLI, see the article: Installation OpenStack CLIuse CLI User named test-conn - place RC File of the created CLI User to your Virtual Machine and execute it starting with dot:
vi openrc. openrc
To find detailed instructions, how to load RC Files, see the article: CLI Users
Please note, that RC file of the current CLI User has already loaded.
get a list of all Volumes created in the corresponding Project and to which your User has access:
openstack volume listIn our case the output will be next:

create an Image from the selected Volume:
openstack image create  \
            --property os_platform='linux' \
            --disk-format qcow2 \
            --volume <volume_ID> <your_image_name>
It may take a long time to create Images from a Volume, please wait until its status becomes active.
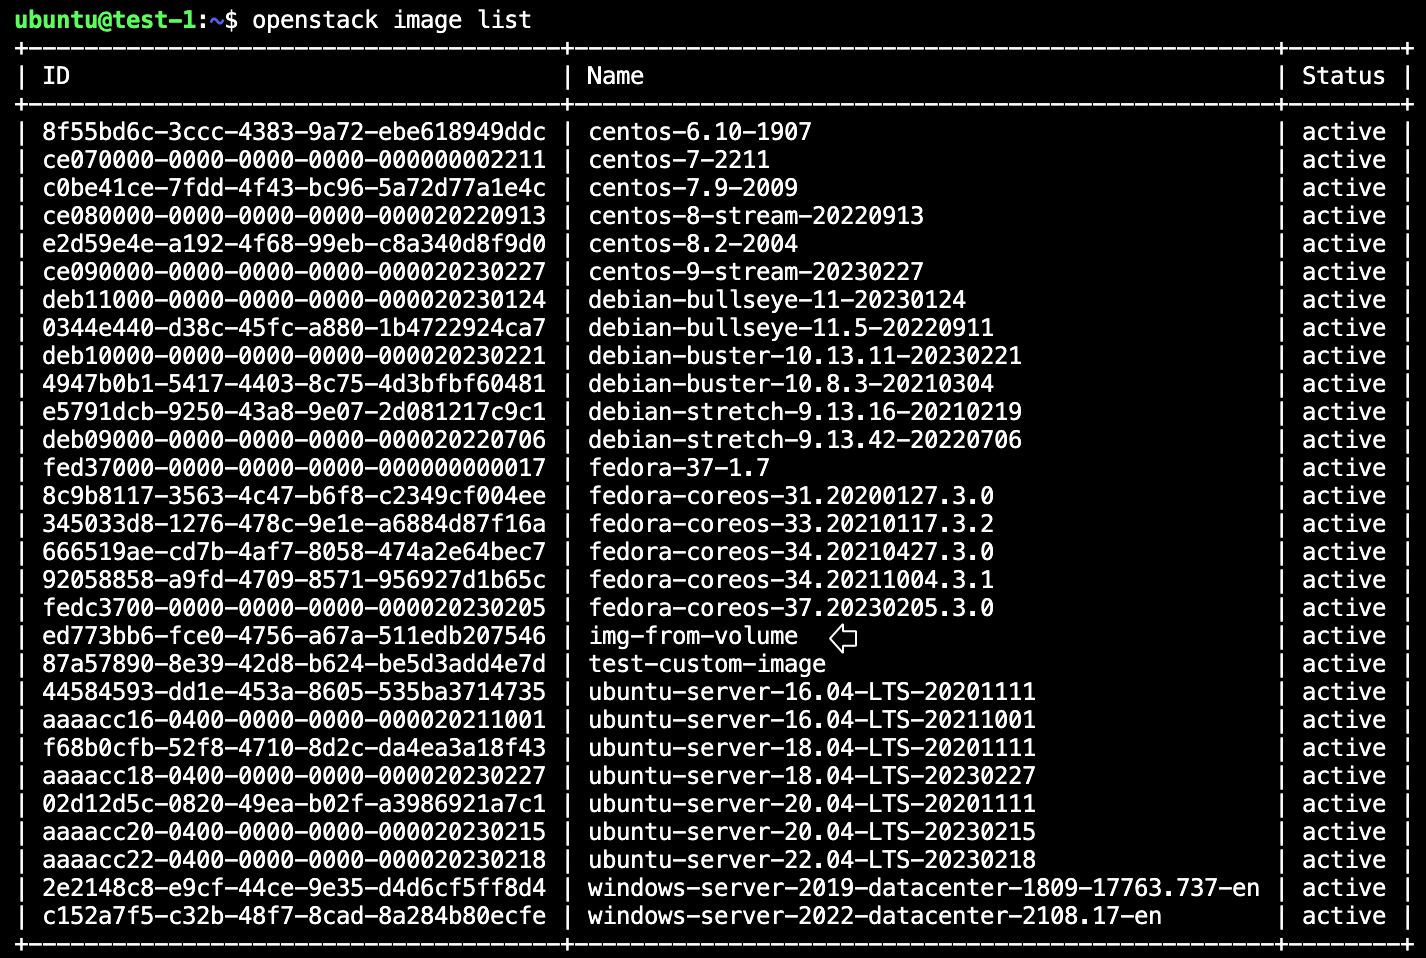
Get a list of Images related to the current Project:
openstack image listIn our case the output will be next:
Remove signature inherited from original volumes metadata, if it is kept it can cause issues during new instance creation.
openstack image unset --property signature_verified <image_id>
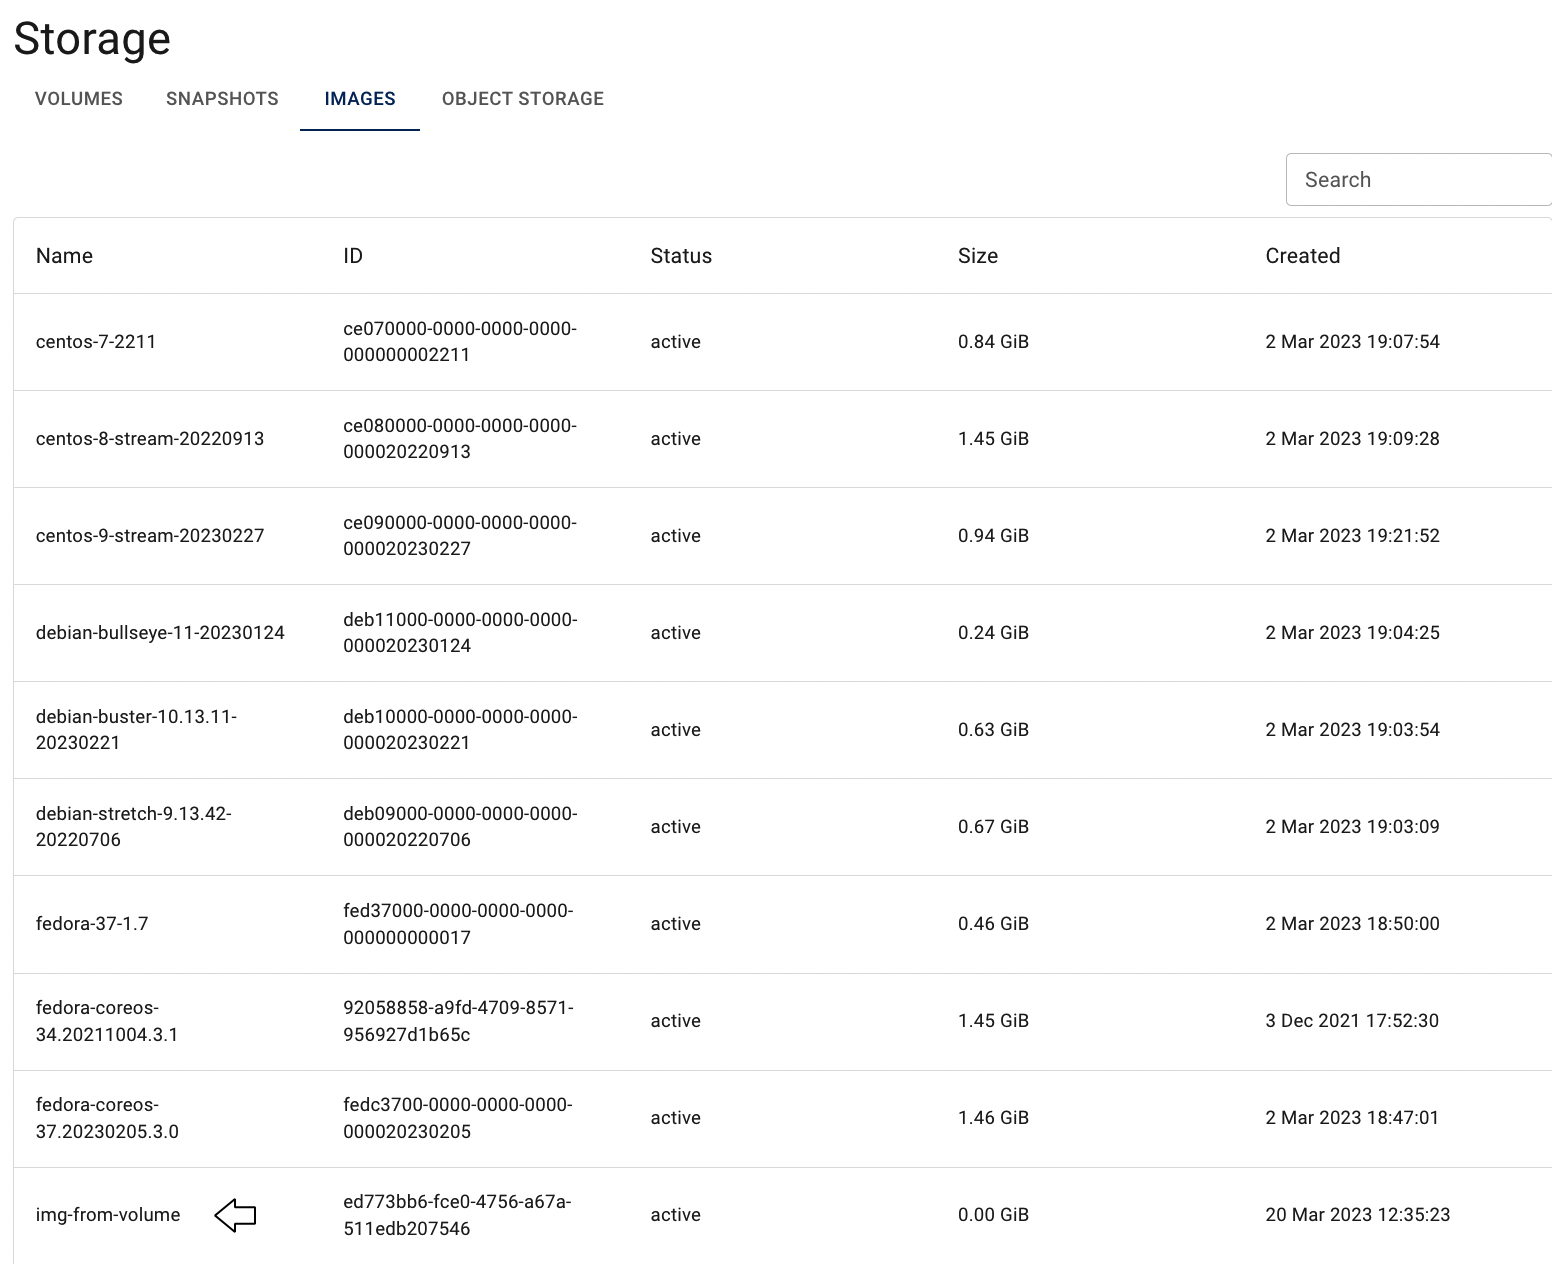
After these steps, the newly created Image will be added to the Images page and you can use to create new Virtual Machines: