Access Windows VM
On this page, you can find an explanation of how to connect to the Windows Virtual Machine created in the Cloud Console using the Remote Desktop Protocol
Table of contents
Prerequisites
In this article we will assume, that we have already created the following resources, that refer to the Project named Test-Project that was created in the Organization named Test-Organization:
- Windows Virtual Machine - that was created with the next parameters and has IP: 185.226.42.128:
- Name: test-win;
- Flavor: VC-4;
- Image: windows-server-2019-datacenter-1809-17763.737-en;
- Networks: public;
- Firewalls: default;
- Volume size: 50.
💡 For more information about creating and configuring these resources, see the following articles: Virtual Machines.
Configuring Firewalls
By default, all created Virtual Machines belong to the default Firewall, which allows access to the Internet from the VM, but denies almost all access on the VM from outside, except for objects belonging to the same default Firewall. Thus, using only the default Firewall, we cannot connect to the selected Virtual Machine remotely via SSH.
📌 Default Firewall allows all outbound traffic and controls the inbound traffic that’s allowed to reach the VMs that are associated with the default Firewall too.
There are two ways how to resolve this:
- to add an additional Firewall with a rule that will allow incoming traffic to TCP port 54000 on the Virtual Machines and assign this Firewall to the VM too;
- to add the required rule to the Firewall that is already assigned to the Virtual Machine.
Create New Firewall with required rule
To create new Firewall do the following:
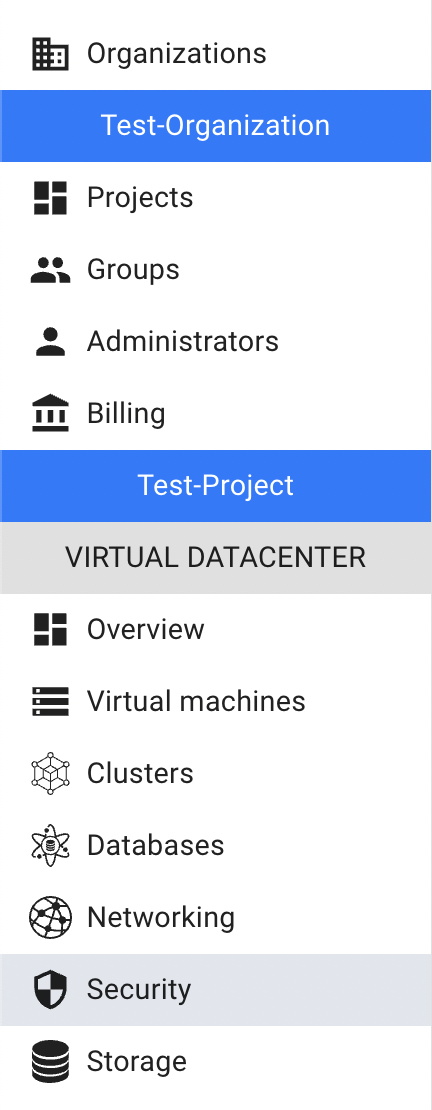
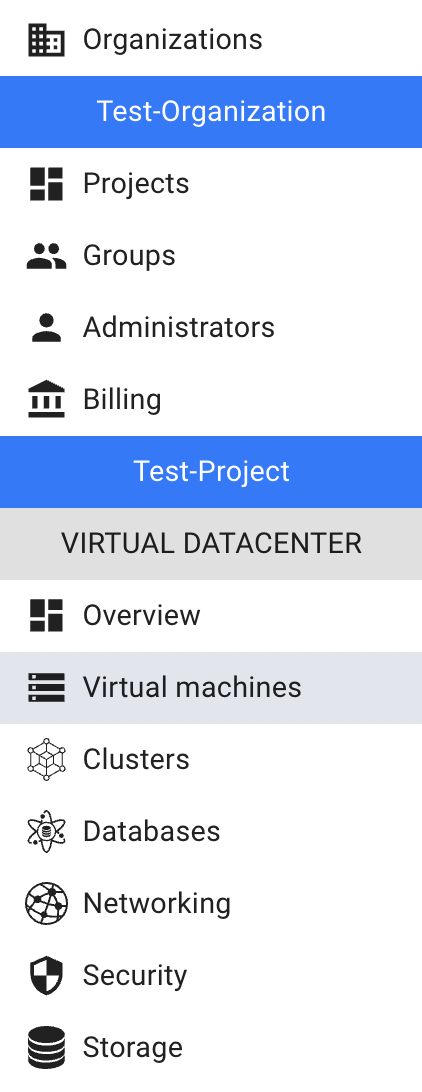
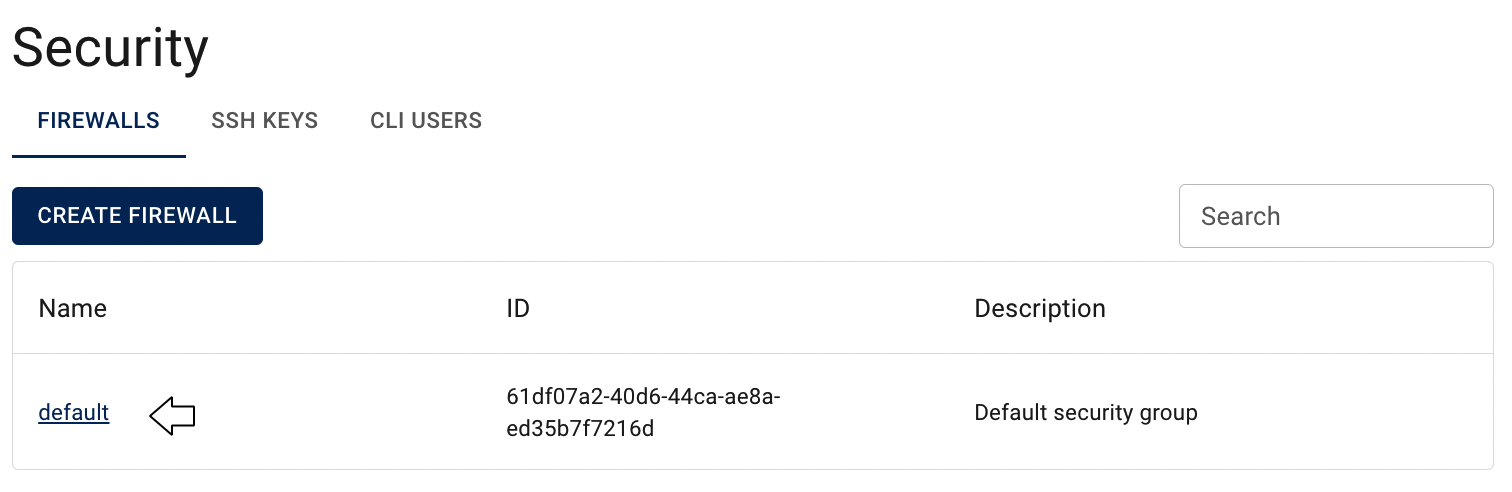
- open the Firewalls page - for this select the Security from the VIRTUAL DATACENTER block and click on the FIREWALL TAB:

- on the Firewalls page click on the CREATE FIREWALL icon in the upper left corner;
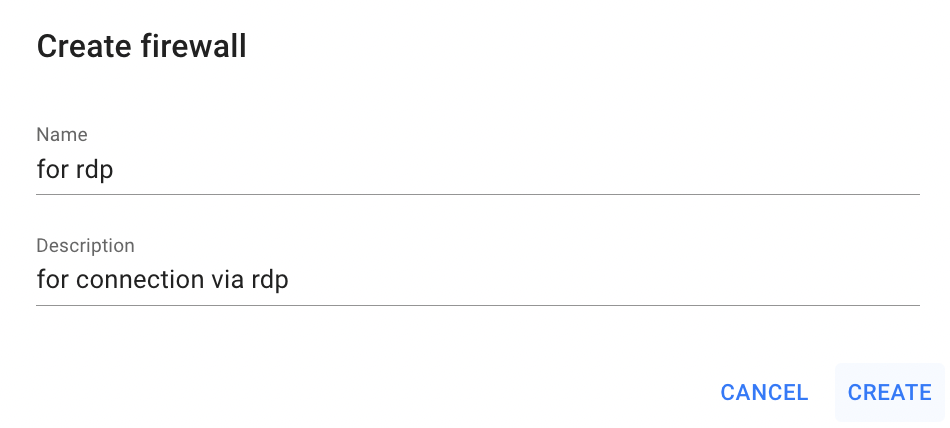
- fill in the form on the next opened Create Firewall window and click on the CREATE icon:
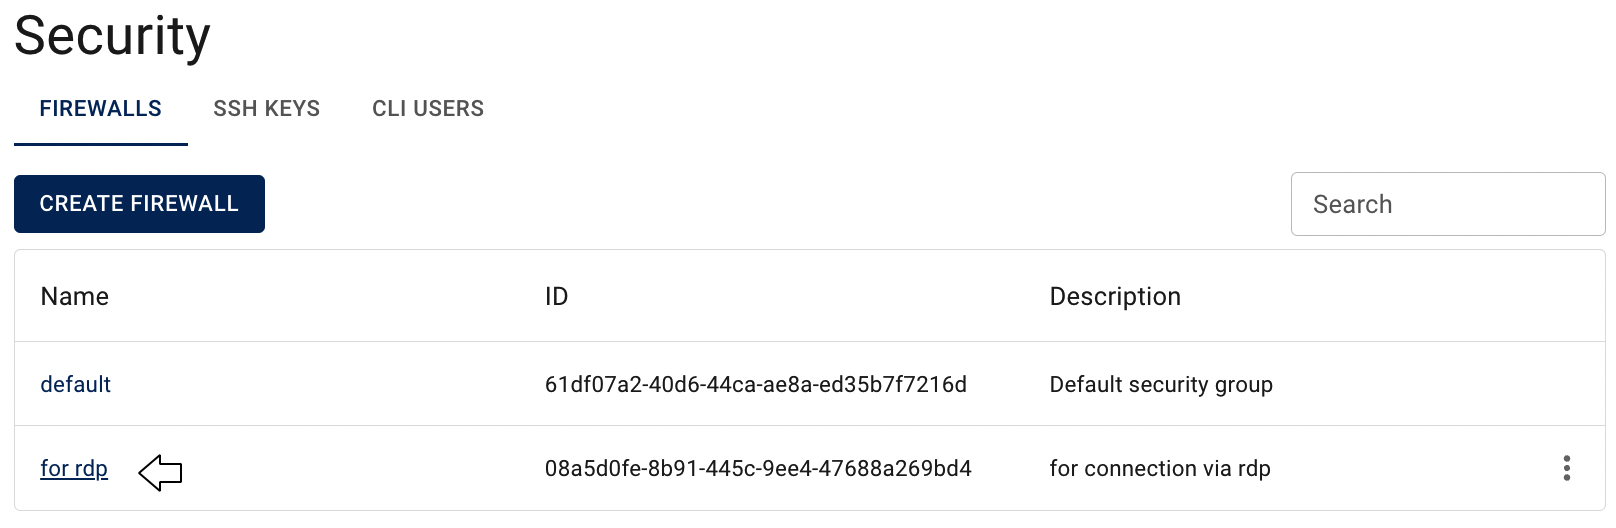
After these steps, the newly created Firewall will be added to the Firewalls page.
📌 As a next step, we need to add an additional Firewall with a rule that will allow incoming traffic to TCP port 54000 on the Virtual Machines.
To add the described above rule to the newly created Firewall do the following:
- open the Firewall Rules page - for this click on the Name of the corresponding Firewall:
- on the Firewall Rules page you can see that rules, that allow all outbound traffic, have been already created by default, but can be deleted if needed. To add additional rule here click on the CREATE FIREWALL RULE icon in the upper left corner:
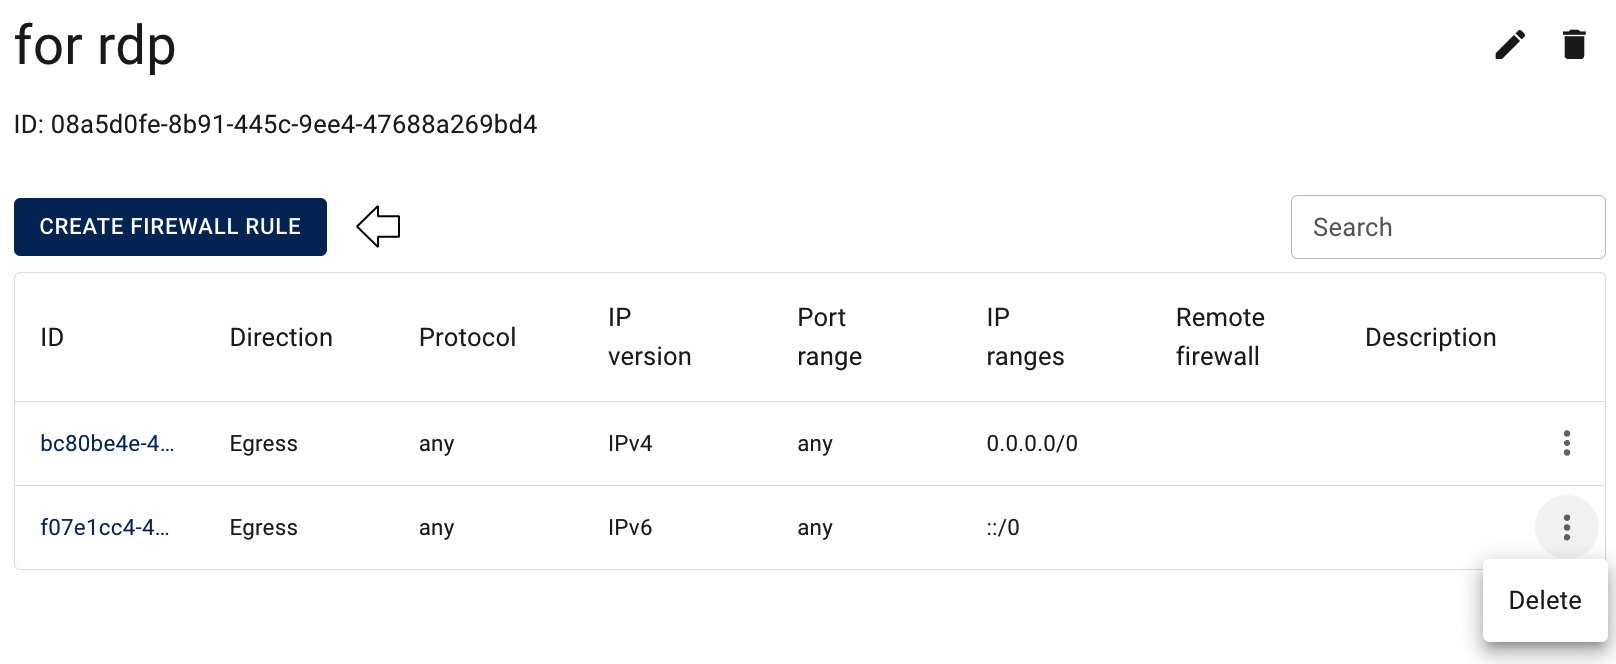
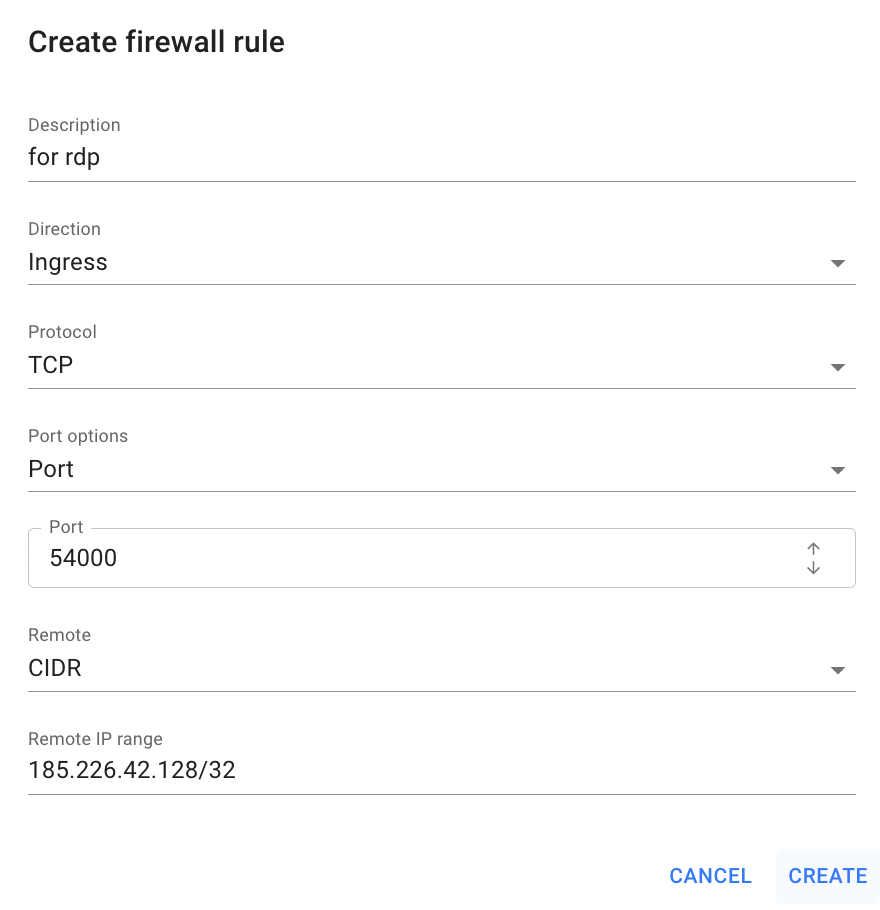
- fill in the form on the next opened Create Firewall Rule window as shown below and click on the CREATE icon:

📝 This newly added rule will allow access to the TCP port 54000 on the all VMs in the created Firewall over the public Internet, but if you want to allow access only on the one selected VM you need to specify IP of this VM / 32 in the field named Remote IP prefix - example is shown below:
After this wee need to add this configured Firewall to our Virtual Machine.
To add this newly created Firewall to our Virtual Machine, do the following:
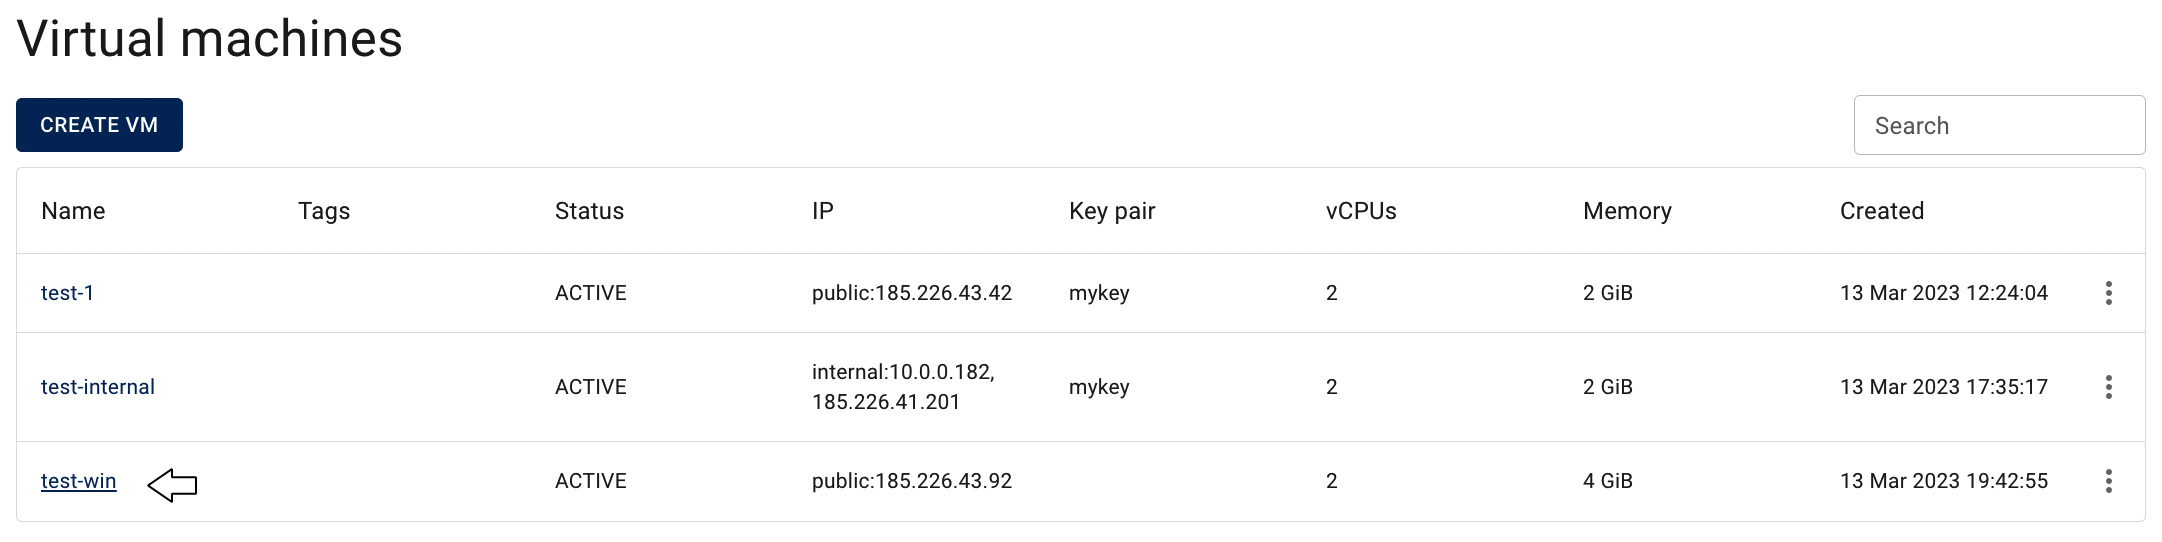
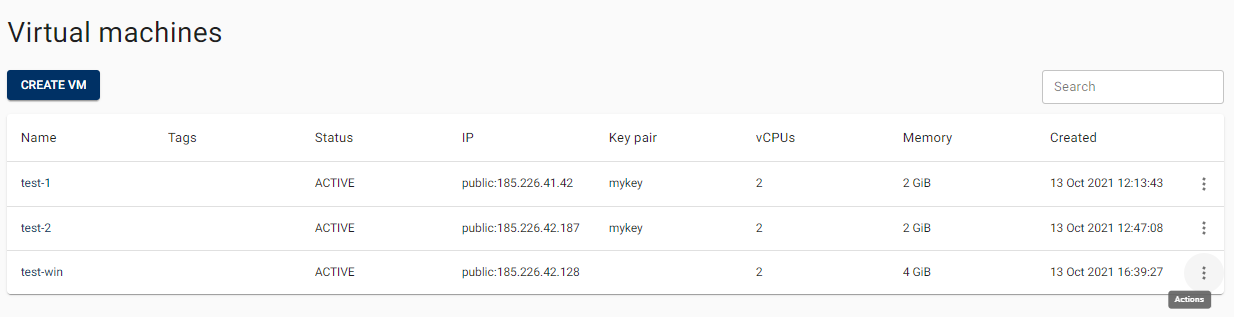
- open the Virtual Machines page - for this select the Virtual Machines from the VIRTUAL DATACENTER block:
- open the Virtual Machine details page - click on the Name of the corresponding Virtual Machine:
- open the NETWORKS & SECURITY TAB, click on the Actions icon and select the Edit Firewalls in the list of available options:

- select our newly created firewall from the list on the opened window and click on SAVE:
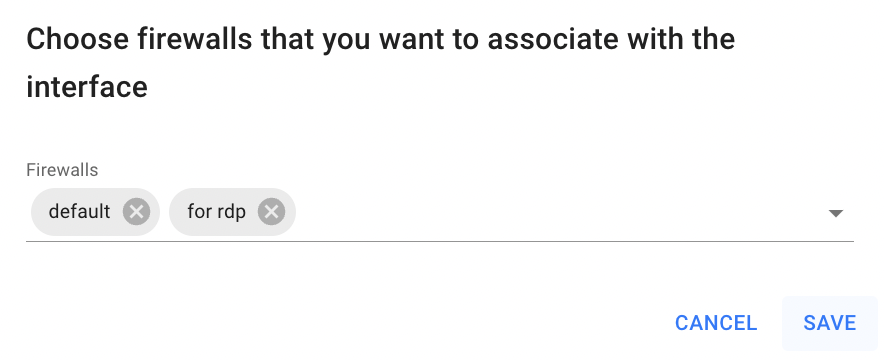
After these steps, the newly added Firewall will be added to the selected VM:

This is the first option, how we can configure the Firewall for RDP access - by creating a new one with the required rule.
📝 Alternatively, we can just add this rule to the default Firewall, that is already assigned to our VM, and these changes will automatically be applied to the VMs.
Add required rule to the existing Firewall
📌 You can add and remove rules at any time. Your changes are automatically applied to the VMs that are associated with the corresponding Firewall.
To add required rule to the default Firewall you need to do next:
open the Firewalls page - for this select the Security from the VIRTUAL DATACENTER block and click on the FIREWALL TAB:
open the Firewall Rules page of the default Firewall - for this click on the Name of the corresponding Firewall:
on the Firewall Rules page click on the CREATE FIREWALL RULE icon in the upper left corner;
fill in the form on the next opened Create Firewall Rule window as shown below and click on the CREATE icon:
And that’s all, this newly created Firewall Rule will be automatically applied to all Virtual Machine that were attached with this default Firewall.
Connect using RDP
Since we have created Windows Virtual Machine and configured Firewall, that allows incoming traffic to TCP port 54000, so we can connect to the selected Virtual Machine remotely via RDP.
For this, do the following:
- download RDP file of the VM:
- identify Windows Virtual Machine for what you want to download RDP file on the Virtual Machines page;
- click on the Actions icon and select the Download RDP file in the list of available options:
- open the downloaded RDP file;
- provide the password of the selected VM and click OK:
📌 For Windows virtual machines, the username is set to “ventus” by default.
And after these steps, a remote connection is established to the selected Windows Virtual Machine: